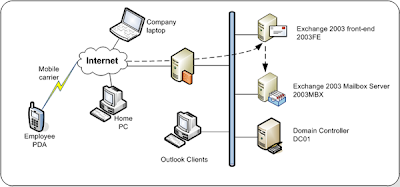
While transitioning from MS Exchange Server 2003 (the older Exchange version) to MS Exchange 2010 (the upgraded version), Exchange database administrators often get worried handling the routing issues that arise out of migration failures. Though all the migrations undergo vigorous testing procedures aimed at detecting potential technical issues beforehand, one of the most common Exchange migration issues faced by enterprises is when messages cannot be delivered from the old to the new Exchange Server.
This blog discusses how one can deal with routing issues while migrating from Exchange 2003 to Exchange 2010.
Understanding Mail Routing in MS Exchange Server 2003 & 2010
Mail Routing is basically a technique that facilitates an organization to keep track of all the important emails by routing messages received from users and external sources to their final destinations. The Routing Engine in an Exchange Server uses the Link State information for mail routing and forwards this information to the Advanced Queuing Engine. Apart from this, the routing engine is also responsible for routing the message communication to both inbound and outbound destinations.
While MS Exchange Server 2003 uses the concept of Routing Groups for routing SMTP messages, Exchange Server 2010 uses the Active Directory site for exchanging information. Now, let’s have a quick look at the routing comparison between different MS Exchange Server versions.
|
|
|
|
|
Exchange Server 2003 |
Exchange Server 2010 |
|
|
Dedicated bridgehead server |
Hub Transport Server |
|
|
Routing Group |
Active Directory Site |
|
|
Routing Group Connector |
IP Site Link |
|
|
Cost of Routing Group Connector |
Cost of IP Site Link |
|
|
|
|
|
In MS Exchange 2010, the routing decisions are made during message categorization which is a technique that uses Microsoft Exchange Transport Service during message processing. After resolving the information about the recipient, the routing component of the categorizer then identifies the final destination for the message. However, the route to that destination is determined by selecting the next segment/hop for the message relay and this information is finally resolved to a list of physical servers and IP addresses.
Also, in Exchange 2010 the message-routing topology is based on IP site links and the routing is automatically configured so that you don’t need to manually configure any routing group connectors. This is made possible because Exchange Server 2010 automatically creates internal Send connectors on Hub Transport Servers that are essential for facilitating the mail flow within the organization and outside.
Routing of messages actually occurs after you install the first Exchange 2010 hub transport server and when the existing Exchange 2003 server is prompted by the installation wizard. The new routing group connector uses that as the bridgehead server while the entire exchange 2010 servers are a part of the same routing group and make use of Active directory sites for routing. As soon as the installation of the first exchange 2010 hub transport server is finished, mails can be exchanged between the two servers (Exchange 2003 and Exchange 2010) via the routing group connector. And this is how the routing of messages takes place.
Resolving the Routing Issues During the Migration
Upgrading the Exchange Server from version 2003 to 2010 is a challenging task since Exchange 2010 comes up with completely different set of features as compared to Exchange 2003. While taking the transition, it’s common that you encounter routing issues that are extremely troublesome to tackle especially if you’re not following the industry best practices concerning data exchange. As a consequence, the message flow between Exchange 2003 and 2010 gets blocked and communication is not properly done between the two servers. This issue primarily occurs when the SMTP communication breaks with Exchange Server 2010 while configuring Exchange 2003 Server smart host in order to route emails.
To resolve the routing issue between the two servers, you should first proceed towards creating a new SMTP connector with some configuration settings so as to allow proper flow of messages between Exchange Server 2003 to 2010.
To help you avoid any migration routing issues while taking the transition, we’ve listed below the sequence of steps that must be followed for smooth data exchange.
Step 1 – Create a new SMTP connector for your routing group by navigating to the Exchange System Manager following the below hierarchy. Remember that the Exchange organization must be configured in order to display routing groups and administrative group options.
Go to Administrative Groups -- Desired Administrative Group -- Routing Groups -- Connectors -- Right Click to Select “New” -- Click SMTP Connector.
Step 2 – By default, the options from the General Tab will be displayed in the Properties window that is popped up before you. Enter the desired name you want to give to your SMTP connector by entering text in the Name field. Having done this, enable the option to “Forward all mail through this connector to the following smart hosts” and add the local bridgehead for the connector by clicking the “Add” option below. Now, the default SMTP virtual server will be displayed as the local bridgehead for connector as shown in the diagram below.
Step 3 – Next, navigate to the Address Space tab and specify the SMTP address space as * along with its cost. Then, select the connector scope as “Entire Organization” or the “Routing Group” whichever is suitable to you and click “OK”.
After you accomplish all the above steps successfully, you must check if any other setting needs to be changed in the Exchange Recovery Manager. In order to resolve the routing issue, you can also try removing the smart host configuration completely to check whether the mail flow is working fine or not.
If you’re still facing the Exchange 2003 to 2010 migration routing issue and are unable to figure out what is wrong with your Exchange configuration settings, then you must proceed towards taking help from third party tools like
LERM (http://www.lepide.com/exchange-manager/) that provide advanced migration solution for quicker exchange while migrating the databases from older versions to advanced versions.
In addition to this, another tool that you can consider is
LepideMigrator for Exchange (http://www.lepide.com/exchangemigrator/) that offers customized mapping of mailboxes between source and destination while also helping in coexistence management. With real time coexistence support offered by LME, the routing of messages between the two exchange servers will go smooth even during the migration period. Any kind of modifications or addition of new items such as email calendar, schedule, contacts or other content on one Exchange Server will also be visible at the upgraded server since LME also facilitates effective data synchronization both ways – from source to destination and destination to source.